Testing Kamal Locally with Multipass

From Rails 7.1 onwards, Kamal 2 is included as a first-class tool for container-based deployments. Kamal aims to make shipping Rails apps to production as painless as possible using Docker. However, before you set things loose on your production servers, it’s often helpful to test your entire deployment flow locally, but deployed to a virtual machine (VM). Unfortunately, I couldn’t find any good documentation on how to do this, even though it turns out to be quite straightforward.
In this post, we’ll walk through setting up a fresh Rails application and deploying it locally using Kamal and Multipass. I’m a fan of validating the Kamal deploy setup locally first, before deploying to a paid VM (a Hetzner VM, Digital Ocean droplet, etc.). Testing our deployment locally we get the benefit of:
- Fast iteration cycles - (almost) everything is happening locally, no need to wait for repositories to push, remote VMs to boot, etc.
- Easier debugging - Multipass makes it very easy to shell into the VM and inspect the state of the containers, logs, and so on.
- Create a known-working configuration - knowing that your Kamal setup works locally, you know any issues you encounter when deploying to a remote machine are specific to that remote environment.
What is Multipass?
Multipass is a lightweight VM manager for running Ubuntu instances on macOS, Windows, and Linux. We’ll use a single Multipass Ubuntu instance to mimic a production-like environment.
Setting Up a Fresh Rails Project
We’ll start by creating a new Rails project with a PostgreSQL database:
rails new kamal-example -d postgresql --skip-solid --skip-action-cable
cd kamal-exampleIf you don’t skip Solid Queue and Action Cable, you’ll need to do some extra configuration with your production environment before deploying, see here.
Bootstrapping the Multipass VM
Install Multipass
Since I’m on macOS, I installed Multipass with Homebrew:
brew install --cask multipassOn Windows or Linux, see the official Multipass installation page.
Launch an Ubuntu VM
We’ll create a new VM with 10GB of disk space and 4GB of memory. (You can be less generous here, especially on disk space if your DB isn’t large. To keep Docker running smoothly, I’d recommend at least 2G of memory).
multipass launch --name kamal-vm --disk 10G --memory 4GIn can take a while for this command to complete the first time you run it, as Multipass needs to download the relevant Ubuntu image. Subsequent runs will be much faster. Once the VM is ready, confirm it’s up and running, with multipass ls or multipass info kamal-vm:
> multipass ls
Name                    State             IPv4             Image
kamal-vm                Running           192.168.64.10    Ubuntu 24.04 LTS

> multipass info kamal-vm
Name:           kamal-vm
State:          Running
Snapshots:      0
IPv4:           192.168.64.10
Release:        Ubuntu 24.04.1 LTS
Image hash:     f11282a728ad (Ubuntu 24.04 LTS)
CPU(s):         1
Load:           0.07 0.19 0.15
Disk usage:     16.2GiB out of 19.3GiB
Memory usage:   1.3GiB out of 3.8GiB
Mounts:         --
At this point, you should take a note of the IPv4 address of the VM, as we’ll be using it to reference the VM in our Kamal configuration (in this case, 192.168.64.10). Anywhere you see <IP-ADDRESS-OF-VM> below, replace it with the actual IPv4 address of your VM.
Enable SSH Access
You should be able to shell into the VM with multipass shell:
> multipass shell kamal-vm
Welcome to Ubuntu 24.04.1 LTS (GNU/Linux 6.8.0-51-generic aarch64)

> lsb_release -a
No LSB modules are available.
Distributor ID:	Ubuntu
Description:	Ubuntu 24.04.1 LTS
Release:	24.04
Codename:	noble
However, since Kamal relies on true SSH to connect to the VM (via SSHKit), we’ll need to do some extra configuration.
We’ll add our local SSH key to the VM’s authorized_keys file. Make sure you have at least one SSH key generated and loaded, ssh-add -L should show something like this:
> ssh-add -L
ssh-rsa AAAAB3NzaC1yc2EAAAADAQABAAABgQDB...
If not, follow GitHub’s instructions for generating a new SSH key. Then run:
multipass exec kamal-vm -- sh -c "mkdir -p /home/ubuntu/.ssh && echo '$(ssh-add -L | awk 'NR==1')' >> /home/ubuntu/.ssh/authorized_keys"ssh-add -Lprints your public keys that are currently in the SSH agent.awk 'NR==1'grabs the first key.- We then append this key to the VM’s
authorized_keysfile, letting you SSH in as theubuntuuser without a password.
Bootstrap Kamal manually
The setup above allows us to SSH into the VM as the default ubuntu user. Kamal expects to connect as the root user by default, so we’ll just need to bootstrap your servers manually per the Kamal docs:
multipass exec kamal-vm -- sh -c "sudo apt update && sudo apt upgrade -y && sudo apt install -y docker.io curl git && sudo usermod -a -G docker ubuntu"Test that everything is working by SSHing into the VM using the <IP-ADDRESS-OF-VM> address, and checking the Docker version:
# <IP-ADDRESS-OF-VM> is the IP address of your VM, e.g. 192.168.64.10

> ssh ubuntu@<IP-ADDRESS-OF-VM>
Welcome to Ubuntu 24.04.1 LTS (GNU/Linux 6.8.0-51-generic aarch64)

> docker --version
Docker version 26.1.3, build 26.1.3-0ubuntu1~24.04.1
Kamal setup
If you generated a new Rails app as above (rails new kamal-example…) with the latest version of Rails, you should already have a config/deploy.yml file - otherwise install the Kamal gem and run kamal init to generate one.
# (if Kamal isn't already installed)
bundle add kamal
kamal init
Even though we’re deploying locally, Kamal requires us to connect to a hosted container registry (like Docker Hub, GHCR, ECR, etc.) to store our Docker images1. The default is Docker Hub, for which we’ll need to create an account and generate an access token (from Account settings → Personal access tokens).
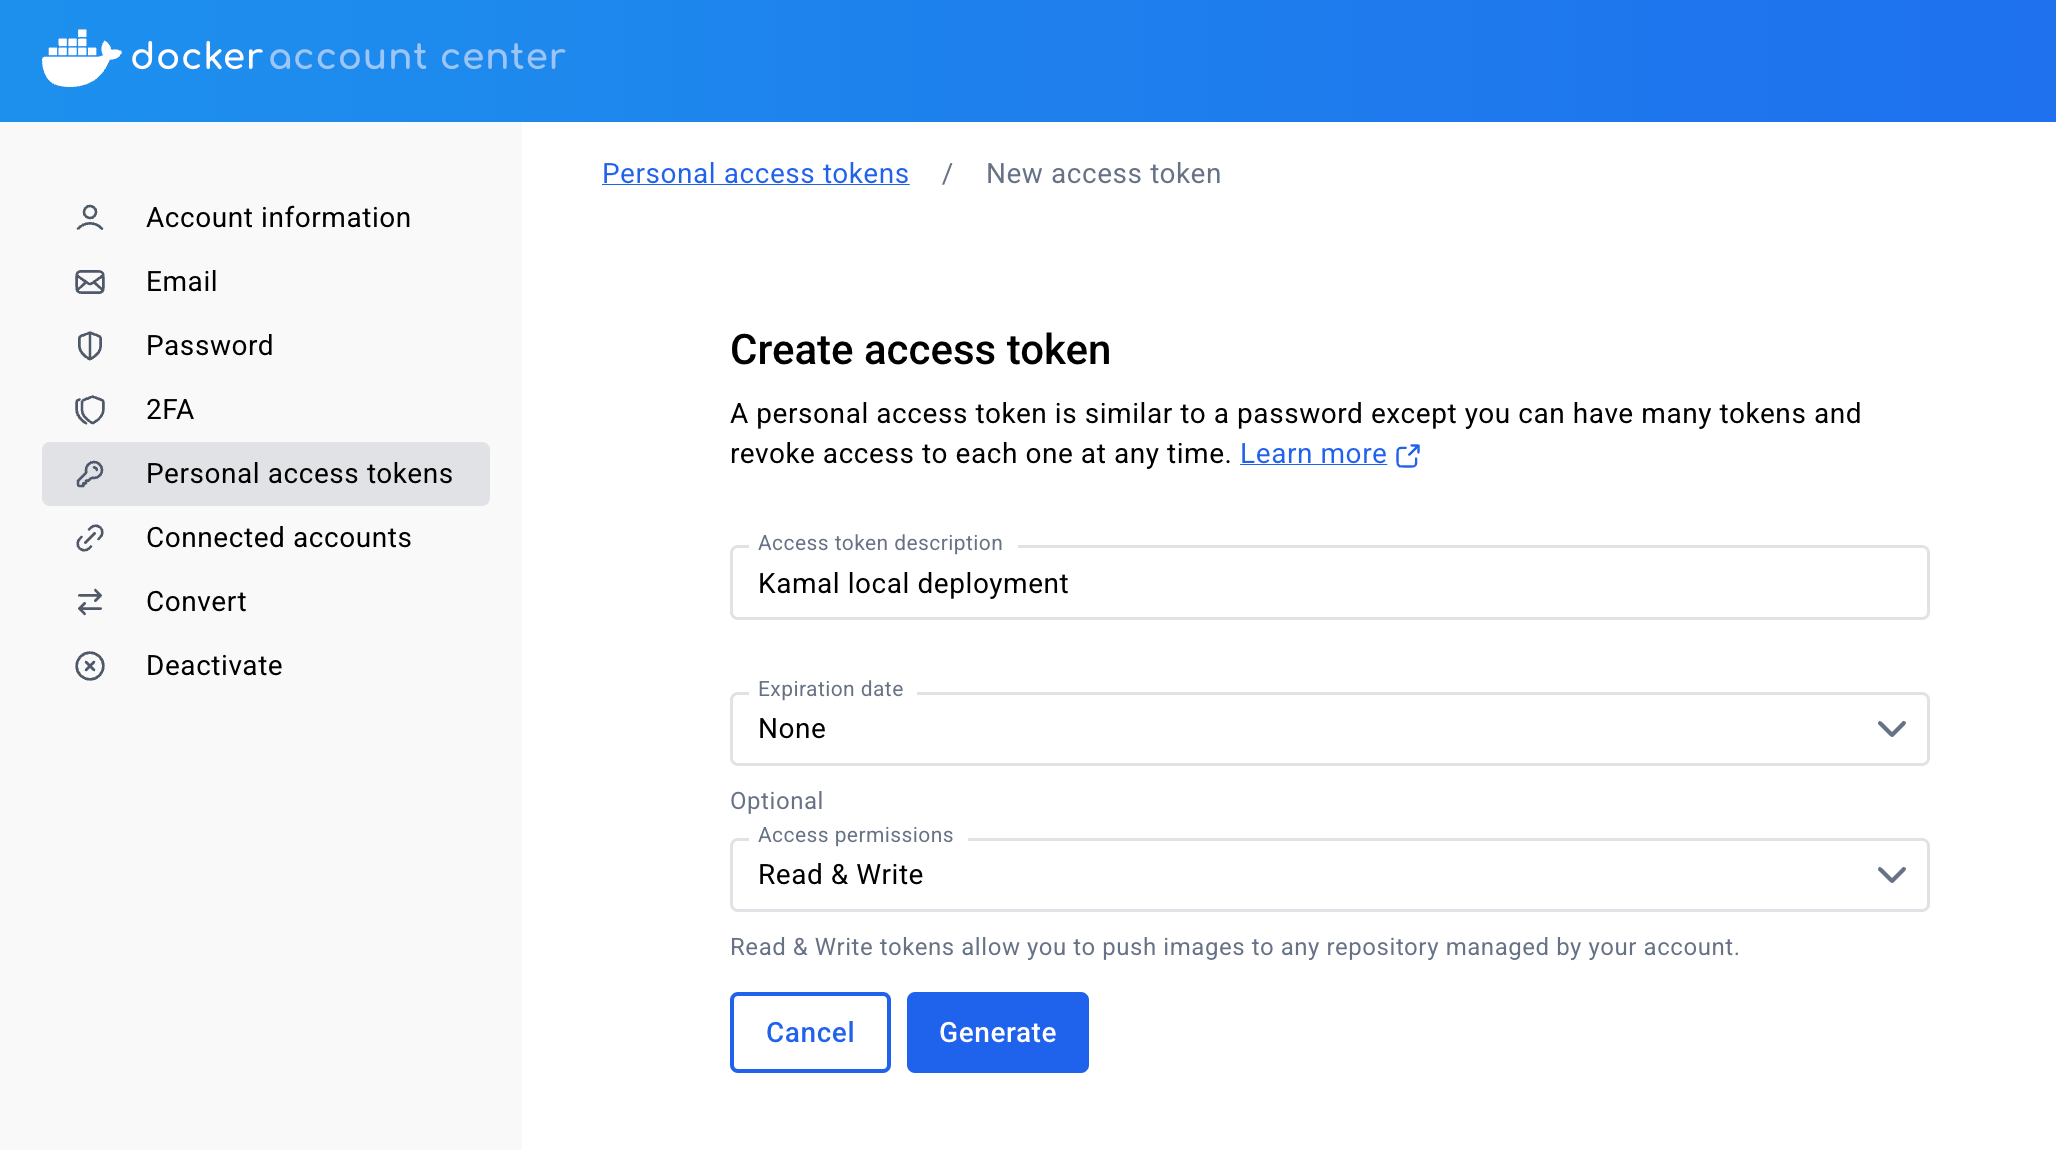
Repositories on Docker Hub are public by default. If your project is intended to be publicly visible (i.e. is open-source), that’s probably fine. Otherwise, you should adjust the repository visibility.
Add your token to your credentials.yml.enc file using bin/rails credentials:edit (substituting dckr_pat_k-ABC... with your actual token):
> bin/rails credentials:edit
# add:
docker_hub_access_token: "dckr_pat_k-ABC..."
Modify registry.username in config/deploy.yml to use your Docker Hub username:
registry:
  username: alexp123
Once you’ve set your IP address and SSH username in the next section, it’s worth also verifying that Kamal can connect to the registry:
# run this after setting servers.web and ssh.user in config/deploy.yml
> bin/kamal registry login

# INFO [a122eafb] Running docker login -u [REDACTED] -p [REDACTED] on 192.168.64.10
# INFO [a122eafb] Finished in 1.344 seconds with exit status 0 (successful).
Bootstrapping a tiny Rails app
Let’s add some basic content to our app, so we can test the deployment. We’ll scaffold a Todo model, and add some example todos via db/seeds.rb.
bin/rails generate scaffold Todo description:text due:dateTodo.create(description: "Learn about Kamal", due: Date.today)
Todo.create(description: "Buy groceries", due: 1.day.from_now)
Todo.create(description: "Finish blog post", due: 2.days.from_now)bin/rails db:prepareYou should be able to run the app locally with bin/rails s, and see the todos in your browser (http://localhost:3000/todos).
It’s also worth checking if we can run the app locally with our production configuration.
# Our `production` database in config/database.yml uses the `kamal_example` user
createuser -s kamal_example

RAILS_ENV=production bin/rails db:prepare
RAILS_ENV=production bin/rails s
Deployment configuration
Now let’s turn our attention to our Kamal configuration in config/deploy.yml. I like to load in our Rails configuration (allowing us to access things like Rails.configuration.database_configuration, avoiding duplication between config/database.yml and config/deploy.yml). Let’s also set a variable for our VM’s IP address, which we’ll need to reference a few times:
# (At the top of the file)
<% ENV["RAILS_ENV"] = "production" %>
<% require_relative "config/application" %>

# Substitute this with <IP-ADDRESS-OF-VM>
<% HOST_IP = "192.168.64.10" %>
Next we’ll make a couple of key changes: setting Docker Hub username and our SSH username (ubuntu) and passing our VM’s IP address as an environment variable. We’ll also disable SSL for now:
# Name of your application. Used to uniquely configure containers.
service: kamal_example

# Name of the container image.
image: your-user/kamal_example
image: alexp123/kamal_example

# Deploy to these servers.
servers:
  web:
    - <%= HOST_IP %>
  # job:
  #   hosts:
  #     - 192.168.0.1
  #   cmd: bin/jobs

proxy:
  ssl: true
  host: app.example.com

# Credentials for your image host.
registry:
  # Specify the registry server, if you're not using Docker Hub
  # server: registry.digitalocean.com / ghcr.io / ...
  username: your-user
  username: alexp123

  # Always use an access token rather than real password when possible.
  password:
    - KAMAL_REGISTRY_PASSWORD

# Inject ENV variables into containers (secrets come from .kamal/secrets).
env:
  secret:
    - RAILS_MASTER_KEY
  clear:
    HOST_IP: <%= HOST_IP %>
  #   # Set number of cores available to the application on each server (default: 1).
  #   WEB_CONCURRENCY: 2

  #   # Log everything from Rails
  #   RAILS_LOG_LEVEL: debug

# Use a different ssh user than root
ssh:
  user: ubuntu

# Configure the image builder.
builder:
  arch: amd64
  arch: arm64
Because I’m using an M-series Mac (specifically an M3 Macbook Air), I also need to set my arch to arm64. You can leave this as amd64 if you’re using an Intel-based Mac or AMD-based Linux or Windows machine.
In this guide we directly modify our config/deploy.yml file, but you may prefer to instead create a separate namespaced file like config/deploy.local.yml. In this case, just append --destination=local to all Kamal commands (e.g. kamal deploy -v --destination=local).
Next, let’s add an accessory for our PostgreSQL database:
<% db_config = Rails.configuration.database_configuration['production'] %>
accessories:
  db:
    image: postgres:17
    host: <%= HOST_IP %>
    port: 5432
    env:
      clear:
        POSTGRES_USER: <%= db_config['username'] %>
        POSTGRES_DB: <%= db_config['database'] %>
        POSTGRES_PASSWORD: <%= db_config['password'] %>
    files:
      - db/production.sql:/docker-entrypoint-initdb.d/setup.sql
    directories:
      - data:/var/lib/postgresql/data
The files section is optional, but it’s often useful to have a setup.sql file which runs when the database is first created. If you include this section, be sure that you have a db/production.sql file in your repository (even an empty one) or the DB will fail to start:
touch db/production.sqlLet’s generate a strong password for our database, and add it to our credentials file:
# or your preferred password generator
> openssl rand -base64 32
1v+L3lxSRTT5PQkDgygaXmTQ+9Otd2R16by6cJiVPYU=

> bin/rails credentials:edit
# add:
kamal_example_database_password: "1v+L3lxSRTT5PQkDgygaXmTQ+9Otd2R16by6cJiVPYU="

# Editing config/credentials.yml.enc...
# File encrypted and saved.
We’ll lastly need to update our config/database.yml configuration, to use the the password from our credentials store, and use our VM’s IP address as the DB host:
production:
  <<: *default
  host: <%= ENV["HOST_IP"] %>
  database: kamal_example_production
  username: kamal_example
  password: <%= ENV["KAMAL_EXAMPLE_DATABASE_PASSWORD"] %>
password: <%= Rails.application.credentials.kamal_example_database_password %>In this instance we’re mimicking a production environment where everything (server, database) is running on a single machine. If you’re deploying to a multi-server setup (i.e. with a dedicated database server), you might instead want to launch a separate Multipass VM for your database.
In this case, your host value in config/database.yml and config/deploy.yml should point to the IP address of this second VM.
Deploying to the VM
Kamal uses Git as its source of truth, and won’t deploy any uncommitted local changes. So be sure to commit your changes before deploying:
git add .
git commit -m "Kamal setup"
Now, let’s boot the PostgreSQL database accessory:
kamal accessory boot db

# INFO [c468a0cf] Running /usr/bin/env mkdir -p .kamal on 192.168.64.10
# INFO [c468a0cf] Finished in 0.216 seconds with exit status 0 (successful).
# Acquiring the deploy lock...
# INFO [4cb90834] Running docker login -u [REDACTED] -p [REDACTED] on 192.168.64.10
# INFO [4cb90834] Finished in 0.959 seconds with exit status 0 (successful).
# <...>
# INFO [69192c5a] Running docker run --name kamal_example-db --detach --restart unless-stopped --network kamal --log-opt max-size="10m" --publish 5432:5432 --env POSTGRES_USER="kamal_example" --env POSTGRES_DB="kamal_example_production" --env POSTGRES_PASSWORD="1v+L3lxSRTT5PQkDgygaXmTQ+9Otd2R16by6cJiVPYU=" --env-file .kamal/apps/kamal_example/env/accessories/db.env --volume $PWD/kamal_example-db/docker-entrypoint-initdb.d/setup.sql:/docker-entrypoint-initdb.d/setup.sql --volume $PWD/kamal_example-db/data:/var/lib/postgresql/data --label service="kamal_example-db" postgres:17 on 192.168.64.10
# INFO [69192c5a] Finished in 10.437 seconds with exit status 0 (successful).
If the DB starts successfully (see Debugging Kamal deployments below for help if it doesn’t), we can finally deploy our main Rails app:
bin/kamal deploy -vThis will prompt Kamal to:
- Connect to the VM via SSH (using
ubuntuas specified indeploy.yml). - Build or pull the Docker image for our Rails app.
- Start the containers for each server (in our case, just
web, but could include background workers, etc.) on the VM. - Run a Docker healthcheck on the
webcontainer.
Note that the exporting to image step can be quite slow, so be patient (it took more than 2 minutes for me):
# DEBUG [2f68bec7] 	#21 exporting to image
# DEBUG [2f68bec7] 	#21 pushing layers 143.1s done
After a successful deployment, you can SSH into the VM to inspect the containers:
> bin/kamal deploy -v

# Log into image registry...
# INFO [ac4c0728] Running docker --version && docker buildx version as alex@localhost
# DEBUG [ac4c0728] Command: docker --version && docker buildx version
# DEBUG [ac4c0728] 	Docker version 27.4.0, build bde2b89
# DEBUG [ac4c0728] 	github.com/docker/buildx v0.19.2-desktop.1 412cbb151f1be3f8a94dc4eb03cd1b67f261dec5
# INFO [ac4c0728] Finished in 0.134 seconds with exit status 0 (successful).
# INFO [35b2d299] Running docker login -u [REDACTED] -p [REDACTED] as alex@localhost
# <...>
# INFO [4062a36c] Running docker image ls --filter label=service=kamal_example --format '\{\{.ID\}\} \{\{.Repository\}\}:\{\{.Tag\}\}' | grep -v -w "$(docker container ls -a --format '\{\{.Image\}\}\|' --filter label=service=kamal_example | tr -d '\n')alexpeattie/kamal_example:latest\|alexpeattie/kamal_example:<none>" | while read image tag; do docker rmi $tag; done on 192.168.64.10
# DEBUG [4062a36c] Command: docker image ls --filter label=service=kamal_example --format '\{\{.ID\}\} \{\{.Repository\}\}:\{\{.Tag\}\}' | grep -v -w "$(docker container ls -a --format '\{\{.Image\}\}\|' --filter label=service=kamal_example | tr -d '\n')alexpeattie/kamal_example:latest\|alexpeattie/kamal_example:<none>" | while read image tag; do docker rmi $tag; done
# INFO [4062a36c] Finished in 0.165 seconds with exit status 0 (successful).
# Releasing the deploy lock...
# DEBUG [3f80aa7b] Running /usr/bin/env rm .kamal/lock-kamal_example/details && rm -r .kamal/lock-kamal_example on 192.168.64.10
# DEBUG [3f80aa7b] Command: /usr/bin/env rm .kamal/lock-kamal_example/details && rm -r .kamal/lock-kamal_example
# DEBUG [3f80aa7b] Finished in 0.128 seconds with exit status 0 (successful).
# Finished all in 150.0 seconds

> ssh ubuntu@<IP-ADDRESS-OF-VM>
> docker ps
CONTAINER ID   IMAGE                                                                COMMAND                  CREATED          STATUS          PORTS                                                                      NAMES
3c56497b7005   alexpeattie/kamal_example:c7ce548d3b968cf88f9cf74737a7eed2f06a684b   "/rails/bin/docker-e…"   41 seconds ago   Up 41 seconds   80/tcp                                                                     kamal_example-web-c7ce548d3b968cf88f9cf74737a7eed2f06a684b
d19e20cb4071   basecamp/kamal-proxy:v0.8.4                                          "kamal-proxy run"        45 seconds ago   Up 45 seconds   0.0.0.0:80->80/tcp, :::80->80/tcp, 0.0.0.0:443->443/tcp, :::443->443/tcp   kamal-proxy
cf4223b8c121   postgres:17                                                          "docker-entrypoint.s…"   46 seconds ago   Up 46 seconds   0.0.0.0:5432->5432/tcp, :::5432->5432/tcp                                  kamal_example-db
You should see your application containers up and running. Finally, you should be able to visit your app in the browser at http://<IP-ADDRESS-OF-VM>, in our case http://192.168.64.10.
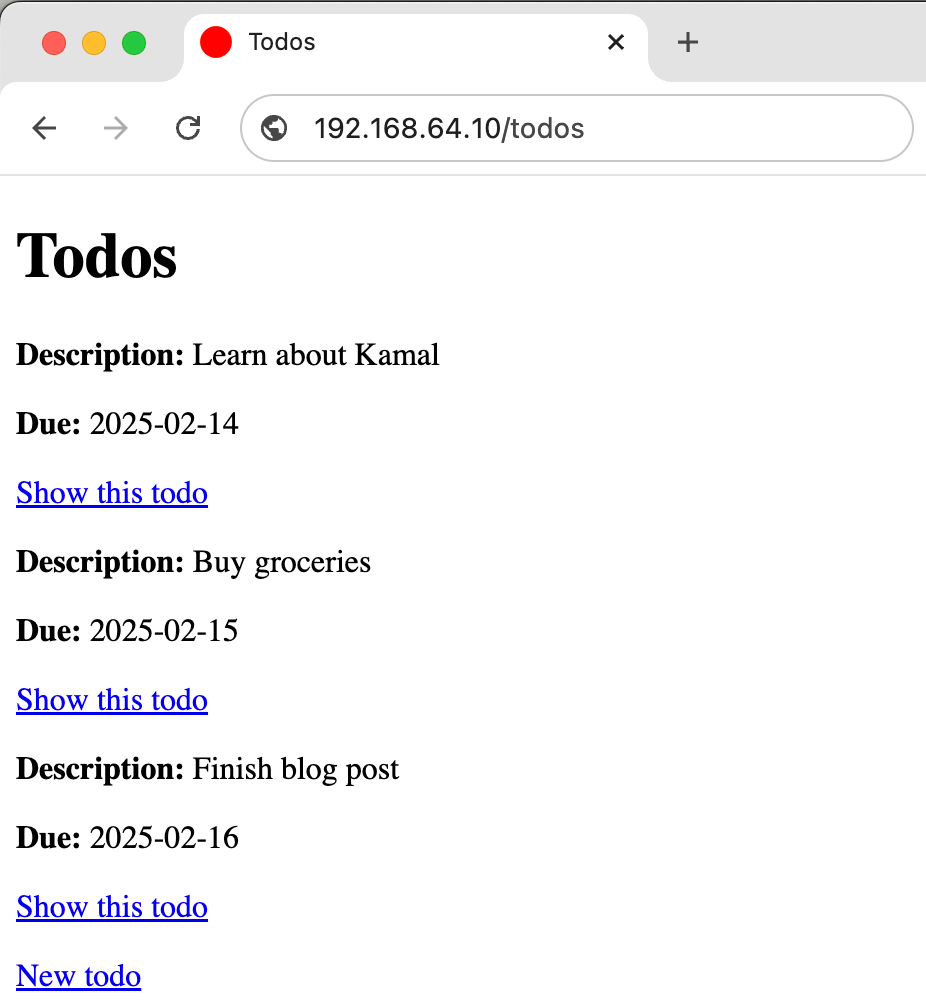
We’re up and running! 🎉
Currently, Kamal Proxy doesn’t support custom SSL certificates, so there’s no straightforward way to test out SSL locally.
Be sure to set proxy.ssl: false in your deploy.yml file. Curiously, I didn’t have to set config.force_ssl = false or config.assume_ssl = false in my config/environments/production.rb file (if anyone knows why, please comment below!)
At the time of writing, there’s an open PR to add support for custom SSL certificates in Kamal Proxy. Once this is merged, you should be able to use tools like chalet and mkcert to test out SSL locally. (I’ll try to write an addendum to this post once custom cert support lands in Kamal).
Debugging Kamal deployments
We’ve covered the happy path, but what if something goes wrong? Kamal is built on top of Docker, so the more familiar you are with Docker, the easier it will be to debug issues.
A starting point is to check containers are running, and view their logs. For example, after booting the database accessory:
kamal accessory boot dbI can shell into the VM and confirm whether the database is running with docker ps:
> multipass shell kamal-vm
# or ssh ubuntu@<IP-ADDRESS-OF-VM>

> docker ps
CONTAINER ID   IMAGE                         COMMAND                  CREATED          STATUS          PORTS                                                                      NAMES
dc8f30a346ae   postgres:17                   "docker-entrypoint.s…"   20 seconds ago   Up 19 seconds   0.0.0.0:5432->5432/tcp, :::5432->5432/tcp                                  kamal_example-db
I can use docker logs to see the logs of the database container (can be useful if the accessory fails to start):
> docker logs kamal_example-db

2025-02-15 13:07:29.289 UTC [1] LOG:  starting PostgreSQL 17.3 (Debian 17.3-1.pgdg120+1) on aarch64-unknown-linux-gnu, compiled by gcc (Debian 12.2.0-14) 12.2.0, 64-bit
2025-02-15 13:07:29.290 UTC [1] LOG:  listening on IPv4 address "0.0.0.0", port 5432
2025-02-15 13:07:29.290 UTC [1] LOG:  listening on IPv6 address "::", port 5432
2025-02-15 13:07:29.293 UTC [1] LOG:  listening on Unix socket "/var/run/postgresql/.s.PGSQL.5432"
2025-02-15 13:07:29.298 UTC [27] LOG:  database system was shut down at 2025-02-15 12:46:07 UTC
2025-02-15 13:07:29.310 UTC [1] LOG:  database system is ready to accept connections
Another useful approach is to take the docker commands that are output from kamal deploy, and adapt them to run an interactive Bash session from inside the VM. For example, the Kamal deploy output might include a line like:
Running docker run --detach --restart unless-stopped --name kamal_example-web-a30a1df0a6e9a6d2f32684b1914544d03f556848 --network kamal --hostname 192.168.64.10-b93cf37ca58d -e KAMAL_CONTAINER_NAME="kamal_example-web-a30a1df0a6e9a6d2f32684b1914544d03f556848" -e KAMAL_VERSION="a30a1df0a6e9a6d2f32684b1914544d03f556848" --env DB_HOST="192.168.64.10" --env SOLID_QUEUE_IN_PUMA="true" --env-file .kamal/apps/kamal_example/env/roles/web.env --log-opt max-size="10m" --volume kamal_example_storage:/rails/storage --volume $(pwd)/.kamal/apps/kamal_example/assets/volumes/web-a30a1df0a6e9a6d2f32684b1914544d03f556848:/rails/public/assets --label service="kamal_example" --label role="web" --label destination alexpeattie/kamal_example:a30a1df0a6e9a6d2f32684b1914544d03f556848 on 192.168.64.10We can substitute --detach --restart unless-stopped with -it (or --interactive --tty) and append a command like bash to run a shell inside the container:
docker run
  -it
  --detach --restart unless-stopped \
  --name kamal_example-web-a30a1df0a6e9a6d2f32684b1914544d03f556848 \
  --network kamal --hostname 192.168.64.10-b93cf37ca58d \
  -e KAMAL_CONTAINER_NAME="kamal_example-web-a30a1df0a6e9a6d2f32684b1914544d03f556848" \
  -e KAMAL_VERSION="a30a1df0a6e9a6d2f32684b1914544d03f556848" \
  --env DB_HOST="192.168.64.10"
  --env SOLID_QUEUE_IN_PUMA="true"
  --env-file .kamal/apps/kamal_example/env/roles/web.env
  --log-opt max-size="10m" --volume kamal_example_storage:/rails/storage
  --volume $(pwd)/.kamal/apps/kamal_example/assets/volumes/web-a30a1df0a6e9a6d2f32684b1914544d03f556848:/rails/public/assets
  --label service="kamal_example" --label role="web" --label destination
  bash
From here, you can run any commands you need to debug your application (e.g. bin/rails c to open a Rails console, bin/dbconsole to open a psql session, etc.). Lastly, it can be helpful to check the .env files in .kamal/apps/<app-name>/env/roles/<role-name> to see the secret environment variables that are available to your application2:
> cat .kamal/apps/kamal_example/env/roles/web.env
RAILS_MASTER_KEY=012343017a48da573c4fa87afda68512
Happy Kamal-ing!
Using Multipass to host a local Ubuntu instance is a convenient way to prototype or practice your Kamal deployments. The ephemeral nature of these VMs makes it easy to start fresh whenever you need, and the quick turnaround helps you catch issues early before pushing to production.
I hope you enjoy playing around with local Kamal deployment, don’t hesitate to drop a comment below if you have any questions!
Footnotes
- For fully local deployments, we could theoretically run our own local registry, but this is outside the scope of this tutorial.↩
env.clearvariables are passed via the command line and appear in the logs forkamal deploy.↩
Loading comments...